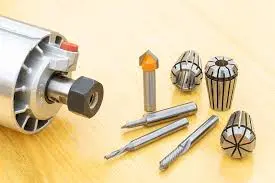
We know that CNC machining involves removing material from a solid workpiece to achieve the desired shape. The toolpath, or G-code, directs the cutting tool (or bit) on its movement, while the tool interacts with the workpiece to create the final result.
Just as you wouldn’t use a dagger to chop ribs, different cutting tools are designed for specific geometries. Selecting the appropriate cutting tool is crucial for the efficiency and success of your project. This article will cover the basics of cutting tools.
First, let’s explore the key features used to classify cutting tools.
Fundamental Terms
Flutes/Teeth
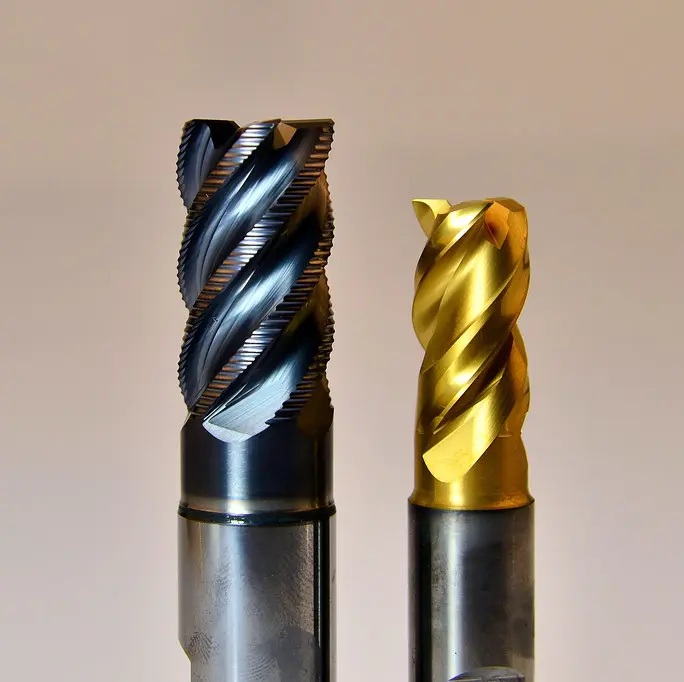
Teeth are the cutting edges of the tool, while flutes are the grooves between the teeth. As the tool rotates, the teeth cut away material, and the flutes help remove the chips (the material that has been cut away) from the workpiece. Although these terms are distinct, they are often used interchangeably because their quantities are typically the same.

Flute Count
The number of flutes on a router tool affects both the cutting speed and the surface finish of the finished product. More flutes provide two key benefits: they enhance the tool's strength, allowing it to cut into the workpiece more quickly and handle tougher materials, and they typically produce a smoother surface finish.
However, opting for the maximum number of flutes isn't always the best choice. This leads us to another important concept: chip clearance. Flutes act as channels for chip evacuation, and chip clearance refers to the space available in each flute. As the number of flutes increases, chip clearance decreases, making it more challenging to expel the chips.
Insufficient chip removal can lead to excessive heat buildup during cutting, which may damage the tool and cause burning, particularly with materials like aluminum that produce large, sticky chips. Therefore, it's essential to balance the number of flutes to optimize performance and prevent overheating.
Flute Types:
There are two primary types of flutes: straight and spiral.
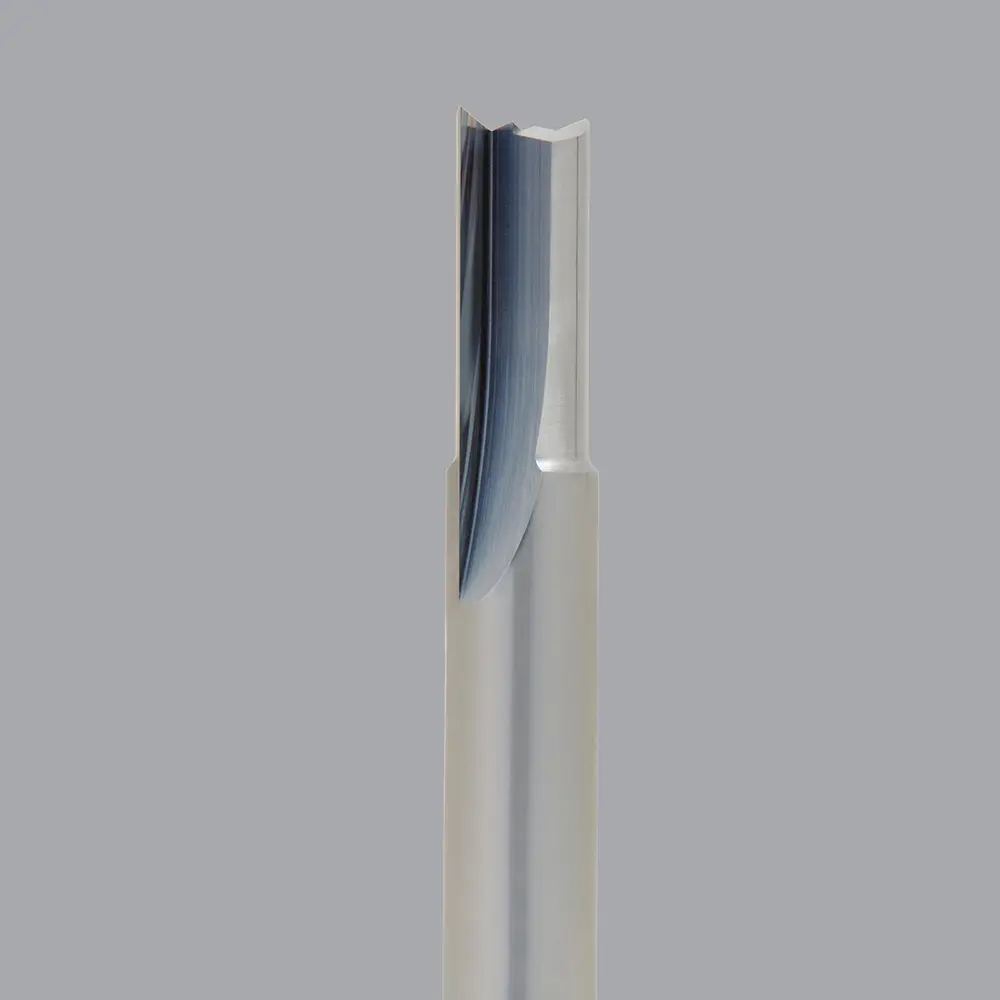
Straight flutes run parallel to the tool's shank and cut into the material perpendicularly to the direction of rotation. These bits are stronger than spiral ones and can handle higher speeds. However, they tend to produce a rougher surface finish due to increased chatter. Straight flutes are typically used for slotting and cutting straight contours.
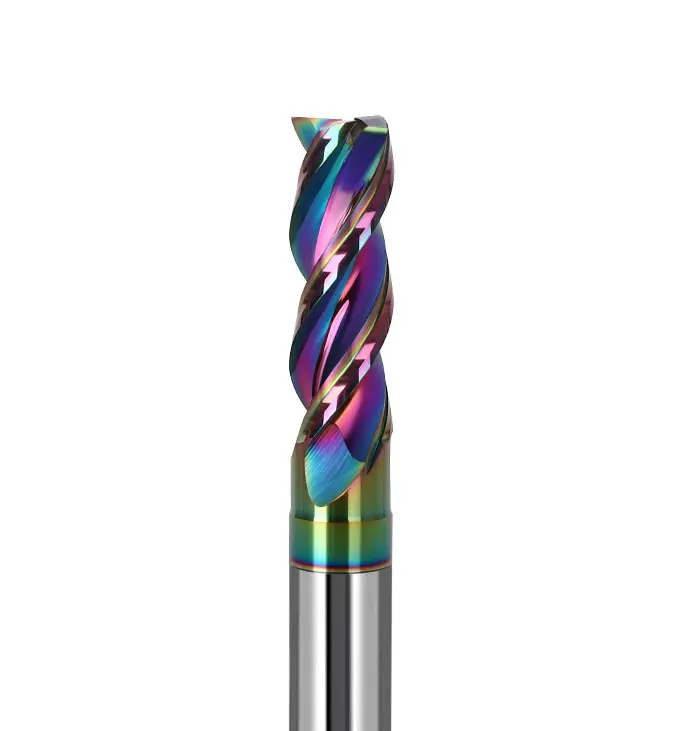
A spiral flute wraps around the tool's shank in a helical pattern, maintaining continuous contact with the material surface. This design reduces chatter and produces a smoother finish, making spiral tools well-suited for surface trimming. However, spiral tools are generally less robust than straight flutes and are not ideal for deep cuts or high-speed operations.
Get Your Free Quote Today
Don't wait any longer on your project!
Geometries
Tip Shapes
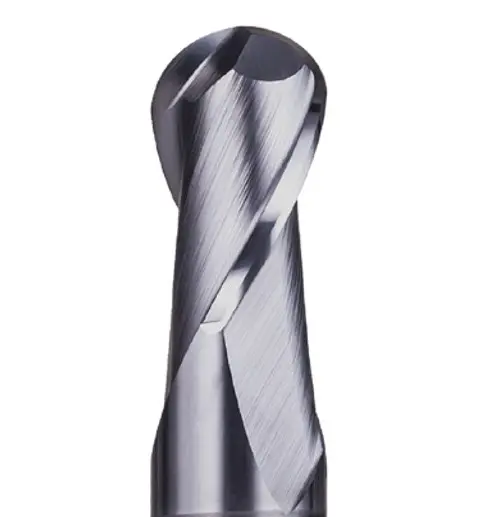
Router tools feature various tip shapes, each designed to create specific cut profiles in the material. Common tip shapes include flat, ball-nose, and chamfer.
- A flat (or square) tip has an almost 90-degree angle between its circumference and the end surface.
- A ball-nose tip features a rounded, spherical end.
- A chamfer tip, also known as a V-bit, has a sharp, conical shape that resembles the letter "V."
Upcut vs. Downcut
Spiral flutes are categorized into upcut and downcut types, each with distinct chip evacuation directions.
In an upcut tool, the spiral flutes twist clockwise around the tool, drawing chips away from the workpiece. This design typically results in a rougher surface finish on the top of the workpiece, while the bottom surface remains smoother.

A spiral downcut bit, on the other hand, directs chips downward as it cuts, with its flutes spiraling counterclockwise around the tool. This type of tool produces a cleaner cut on the top surface but may leave a rougher finish on the bottom.
It is important to use an upcut tool for plunging operations, particularly with thicker materials. A downcut bit can cause chips to accumulate and grind against each other, leading to friction that may generate heat and potentially cause a fire.
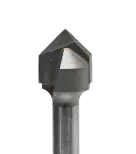
Center Cutting vs. Non-Center Cutting
Router tools are categorized as either center cutting or non-center cutting. Center cutting tools have cutting edges that extend to the center, allowing them to plunge directly into the material. Non-center cutting tools, however, leave a central hole and cannot perform plunging cuts.
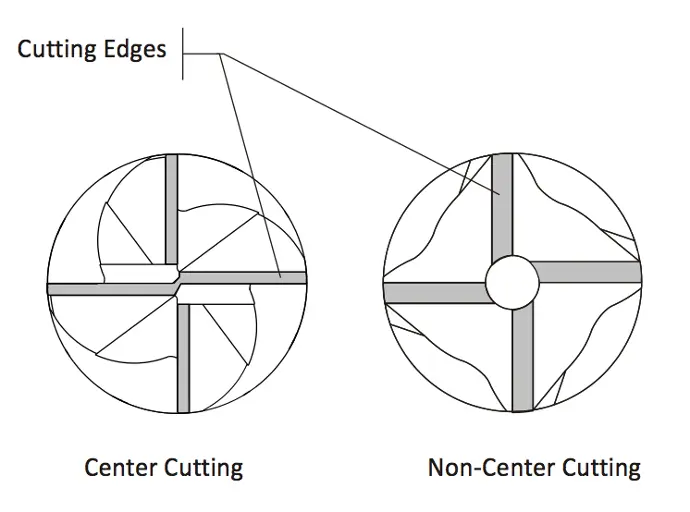
If a non-center cutting tool plunges into the material, the section of material around the central hole remains uncut, which can damage the tool and potentially cause overheating. To use these tools safely, you should drill a pilot hole or employ ramp plunge techniques. The main advantage of non-center cutting tools is their lower cost.
Size
Essentially, the size of a router tool dictates its capabilities. Larger tools are effective for removing substantial amounts of material but sacrifice precision. Conversely, smaller tools offer greater detail but with reduced strength and machining efficiency.
Overall Length
The overall length refers to the measurement from one end of the tool to the other. Longer tools can reach deeper into the material. While it might seem that longer tools provide more versatility, this isn't always advantageous.
This introduces the concept of "stickout," which measures the distance from the end of the collet (or tool holder) to the tip of the tools. This is the portion of the tool that extends unsupported. The greater the stickout, the less stable the tool becomes. Excessive stickout can cause the tool to bend under the cutting forces.
Cutting Length
The cutting length (or "flute length") refers to the portion of the tool that actually engages in cutting. It dictates how deep the tool can penetrate the material. It's important to ensure that the cutting depth does not exceed the flute length, as doing so can prevent proper chip removal and potentially damage the tool due to excessive heat buildup.
Shank Diameter
The shank diameter is the width of the non-cutting end of the tool that fits into the collet. Common shank sizes include 3.175 mm (1/8 inch) and 6.35 mm (1/4 inch).
Cutting Diameter
The cutting diameter refers to the diameter of the router tool's cutting end. This measurement is crucial for determining the precision and size of the cuts your tool can make. The cutting edge of the tool will leave a circular profile in internal corners with a radius equal to half the cutting diameter.
Additionally, features smaller than the cutting diameter cannot be cut out with standard tools, as they are cylindrical (excluding V-bits). For instance, a tool with a cutting diameter of 3.175 mm cannot create a slot narrower than 3 mm.
Summary
CNC machining involves precisely shaping a workpiece by removing material with a cutting tool guided by a toolpath or G-code. Choosing the right cutting tool is vital for project efficiency and success, as tools are designed for specific geometries. Key factors include the number of flutes, which affects cutting speed and surface finish; flute types (straight vs. spiral), influencing finish quality and strength; and tip shapes (flat, ball-nose, chamfer), which determine cut profiles.
Additionally, upcut and downcut spirals affect chip evacuation and surface quality. Router tools are categorized as center or non-center cutting, affecting their plunging ability. Tool specifications such as size, overall length, cutting length, shank diameter, and cutting diameter impact performance and precision. Balancing these factors ensures optimal machining results.